
Everything You Need to Know Before Adding a Room to Your House
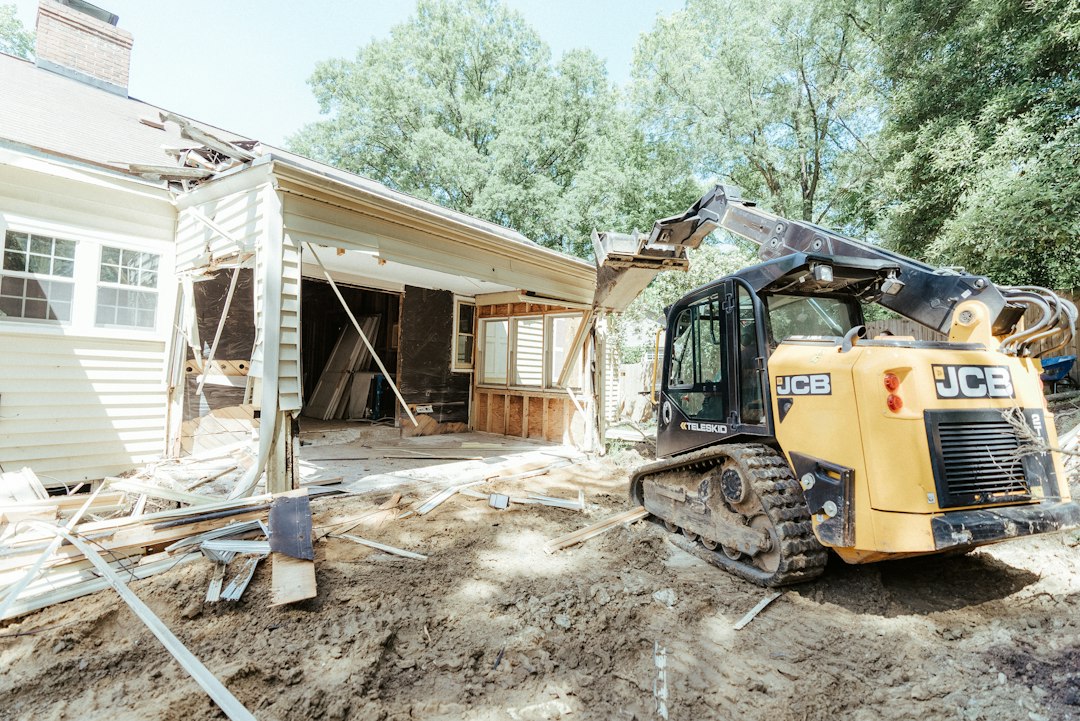
Plan a House Addition Before You Build
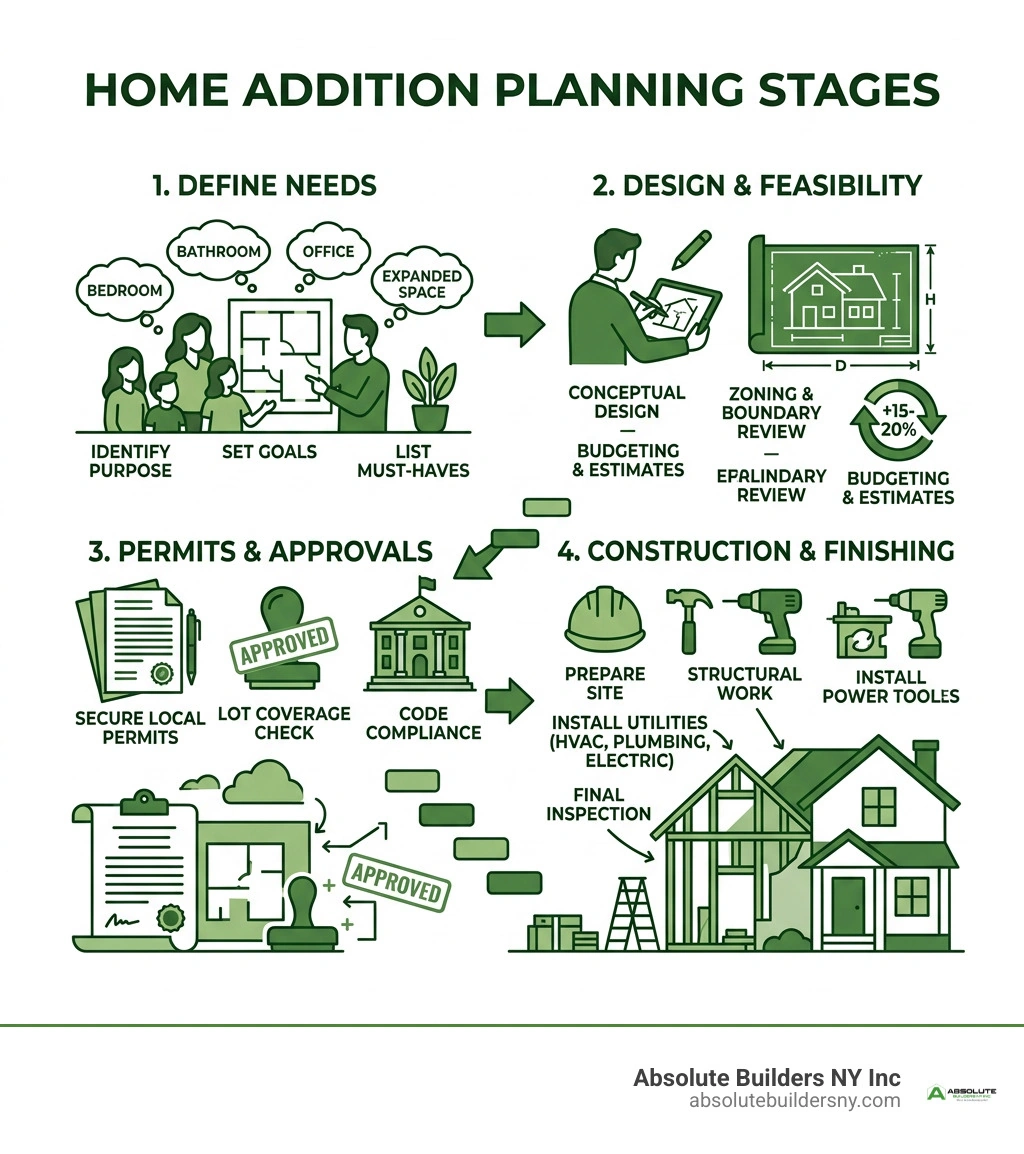
Adding an addition to a house starts with four practical decisions: what space you need, what your property can support, what you can afford, and what local rules allow. For a Long Island homeowner considering a dormer, begin by confirming attic headroom, roof structure, setback rules, and whether the new space will need stairs, insulation, HVAC, plumbing, or egress windows.
A clear early plan prevents the most expensive surprises later:
- Define the goal: bedroom, bath, office, primary suite, or expanded attic space.
- Check zoning, lot coverage, and permit requirements before finalizing a design.
- Set a realistic budget, including a 15-20% contingency for structural and site-related issues.
- Work with qualified design and construction professionals for structural changes, roofing, electrical, plumbing, and HVAC work.
In 2026, room additions average about $185 per square foot nationally, though Long Island costs can be higher because of labor rates, permits, finish selections, and complex roof or structural tie-ins. A dormer can add usable headroom without expanding your home's footprint, but it still requires careful engineering and a design that fits the original house.
I am Jacolyn Gleason, a public relations professional with experience translating complex home, wellness, and consumer topics into clear, useful content. For homeowners researching adding an addition to a house, I focus on the planning questions that help turn an architectural idea into a sound decision.
Adding an addition to a house terms to know:
Evaluating the Best Style of Home Addition for Your Needs
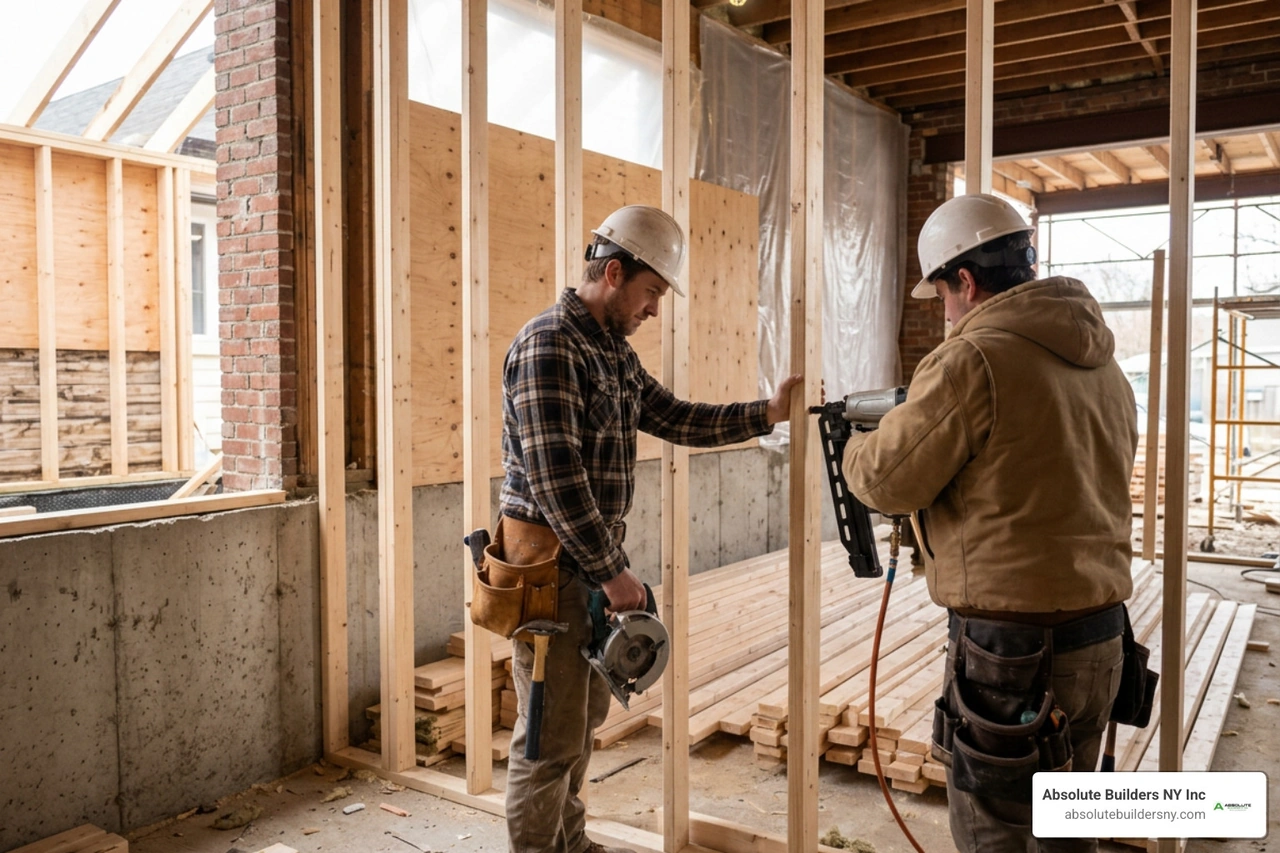
Every house has its own structural personality and property boundaries. Before you tear into any walls or draft blueprints, it helps to understand the main architectural paths available. The layout you choose directly dictates your structural footprint, how your property setbacks are measured, and the overall room addition cost.
Whether you need a sunlit morning room, an extra guest wing, or a place for grandparents to settle in comfortably, matching your practical lifestyle needs with the right structural approach keeps the build smooth and enjoyable.
Ground-Floor Extensions and Bump-Out Additions
Ground-floor extensions build directly outward from your existing ground-level living space. A full ground-floor addition requires pouring a new foundation—either a poured concrete slab, a crawlspace, or a full basement extension—and building walls up to meet an extended roofline.
If you only need a little extra breathing room, a bump-out addition might be the ideal option. Bump-outs extend a room by 2 to 4 feet outward without requiring a full foundation excavation. Instead, they often rely on cantilevered floor joists supported by your home’s existing framing:
- Footprint Expansion: Great for expanding a dining alcove, creating space for an oversized kitchen island, or adding a walk-in closet.
- Foundation Independence: Because cantilevered designs skip heavy excavation, they usually cost 15% to 30% less than a standard full-depth room extension.
- Design Impact: They provide just enough square footage to transform high-traffic areas without eating up large portions of your backyard.
If you are reimagining your culinary space, pairing a modest bump-out with a thoughtful custom kitchen design can deliver a massive visual and functional upgrade.
Adding a Second Story to Double Your Living Area
When your property lot is on the narrower side or you want to preserve your outdoor patio and landscaping, building upward is the natural solution. A full vertical expansion can double your living area without changing your foundation's footprint on the ground.
Building upward involves removing the existing roof, reinforcing the first-floor framing to handle the new structural load, and integrating an interior staircase that flows naturally with your existing floor plan.
Because of the specialized structural engineering, roof removal, and safety protocols, reviewing the second story addition cost early in your planning is essential. If you want upper-level space without removing the entire roof structure, exploring a dormer addition complete guide can show you how shed or gable dormers create usable ceiling height and light at a lower overall price point.
Converting Existing Garages, Attics, and Basements
Sometimes the most efficient way to gain square footage is to capture space that is already sitting under your roof. Repurposing existing areas cuts down on exterior framing and site excavation while delivering fully conditioned living quarters.
- Garage Conversions: Repurposing an attached garage into a family room, gym, or in-law suite addition averages around $15,000 for simple finishes, making it one of the most accessible conversions available.
- Attic Transformations: Converting an unfinished attic into a bedroom or home office costs roughly $40,000 nationally. You will need to ensure a minimum 7-foot ceiling clearance over at least 50% of the usable floor area and install safe code-compliant stairs.
- Basement Finishing: Exploring basement finishing and beyond to maximize space and value often costs about half as much per square foot as building from scratch. Installing proper subfloor moisture barriers, sump pumps, and code-compliant egress windows ensures the lower level is dry, bright, and completely legal.
Total Cost Breakdown of Adding an Addition to a House in 2026

Nationally in 2026, the overall cost for a residential home addition averages $51,025, with standard single-room to multi-room projects typically spanning between $21,907 and $83,349. However, complex projects involving wet rooms (kitchens and bathrooms) or multi-story framing can run considerably higher.
Labor generally accounts for 40% to 60% of your total budget, with skilled trade work, general contractor management, and site preparation driving the overall investment.
Average Cost Per Square Foot and Room-Type Breakdown
National ground-floor additions range between $120 and $300 per square foot, settling at a national average of $185 per square foot. In markets like Long Island, New York—including communities across Nassau County and Suffolk County such as Huntington, Massapequa, Westhampton, Bayville, and West Babylon—labor rates, localized snow/wind load codes, and permit fees place typical projects between $200 and $600 per square foot depending on finish grade.
Review the benchmark data on home addition cost per square foot in 2026 alongside our overview below to see how room types compare:
| Addition Type | Typical Size (Sq. Ft.) | National Cost Range (2026) | Avg. Cost / Sq. Ft. | Primary Budget Drivers |
|---|---|---|---|---|
| Bump-Out Addition | 50 – 100 | $8,000 – $25,000 | $150 – $250 | Cantilever framing, exterior tie-in |
| Ground-Floor Bedroom | 200 – 400 | $32,000 – $80,000 | $140 – $220 | Foundation slab, windows, HVAC extension |
| Bathroom Addition | 40 – 100 | $35,000 – $90,000 | $300 – $600+ | Dense plumbing, tile, vanity, venting |
| Kitchen Expansion | 150 – 350 | $45,000 – $120,000 | $250 – $500 | Wet walls, cabinetry, countertops, gas lines |
| Full Second Story | 800 – 1,500+ | $175,000 – $600,000 | $200 – $500 | Roof removal, joist sistering, stairs, HVAC |
| Garage Conversion | 300 – 500 | $15,000 – $45,000 | $50 – $120 | Slab insulation, drywall, door conversion |
For a broader breakdown of project scales and site conditions, review our guide to the cost of adding on to a house.
Low-Cost Strategies When Adding an Addition to a House
Trimming construction costs does not mean sacrificing quality. A few smart design choices can significantly reduce expenses without compromising structural integrity:
- Keep the Footprint Simple: Stick to straightforward rectangular or square layouts. Every complex angle or jog in a foundation wall adds extra framing, concrete labor, and roof flashing steps.
- Cluster Your Plumbing: If you are adding a bathroom, laundry room, or wet bar, place it adjacent to existing plumbing stacks or shared wet walls to minimize pipe runs through your subfloors.
- Use Standard Dimensions: Design rooms in increments of two or four feet (such as 12x16 or 16x20). Standard lumber, drywall, and plywood sheets come in 4x8-foot dimensions, cutting down on material waste and labor hours.
- Select High-Performance Value Materials: Modern engineered vinyl plank (EVP) flooring, fiberglass entry doors, and quality semi-custom cabinetry provide exceptional longevity and style without luxury custom price tags.
Hidden Expenses and Structural Work to Budget For
Every major build comes with a few behind-the-scenes expenses. We always recommend setting aside a 15% to 20% contingency fund to cover these common hidden items:
- Electrical Service Upgrades: Adding 300 to 800 square feet of conditioned space frequently overloads older 100-amp or 150-amp electrical panels, requiring a service upgrade to 200 or 400 amps.
- HVAC Sizing and Ducting: Your existing furnace or heat pump may not have the tonnage capacity to heat and cool extra rooms. Adding a mini-split heat pump system or upgrading your central equipment is often required.
- Foundation and Soil Conditions: Excavating near mature trees, high water tables, or sandy coastal soil can require specialized footings, soil compaction, or drainage drywells.
- Property Tax and Insurance Adjustments: Increased livable square footage triggers an assessment adjustment by your local town assessor, which will modestly raise your annual property taxes and homeowners insurance policy premiums.
Step-by-Step Roadmap: Permits, Design, and Construction Timelines
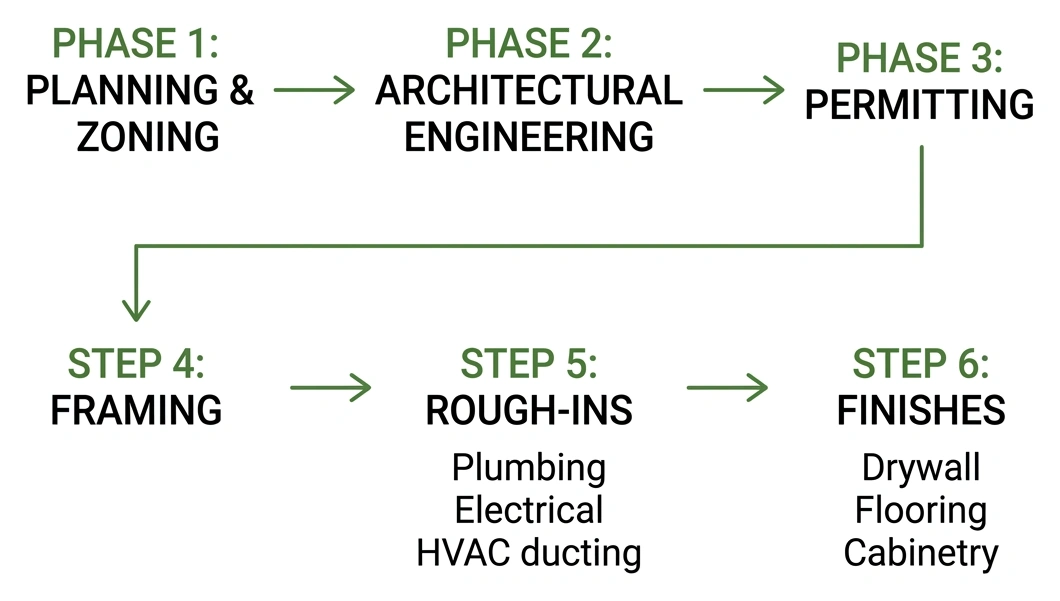
Executing an addition requires clear sequencing. Moving systematically through every phase ensures that building inspectors, trade mechanics, and carpenters stay perfectly synchronized.
Key Permits and Navigating Local Building Regulations
You cannot begin digging until your municipal building department approves your plans. In most jurisdictions, building, electrical, plumbing, and mechanical permits are legally required for additions.
Before submitting plans, verify your town's zoning parameters:
- Setback Requirements: How close your new exterior walls can be to front, side, and rear property lines.
- Lot Coverage Ratios: The percentage of your land that can be occupied by physical roof structures and impermeable surfaces.
- Height Restrictions: Maximum allowable roof peak heights, especially when adding a second story or dormers.
To review sample municipal permit forms, applications, and procedural requirements, look over the local building permit application forms provided by local town clerks. Working with professionals who handle municipal filings directly prevents weeks of administrative delays.
Structural Engineering, Architecture, and Contractor Selection
A solid addition rests on accurate math and sound architectural design. Whenever a project involves tying into existing load-bearing walls, cutting into roof trusses, or bearing down on older foundations, a licensed structural engineer must specify beam sizing (such as LVLs or steel I-beams) and footing dimensions.
When interviewing general contractors, verify the following:
- Active general liability and workers' compensation insurance.
- Specific experience managing your exact style of addition (e.g., vertical second stories vs. ground extensions).
- Transparent, line-item bid proposals that clearly define material allowances, cleanup expectations, and change-order procedures.
Project Timeline and Managing Construction Phases
Most single-story additions take between 3 and 5 months from groundbreaking to final inspection, while full second-story additions take 4 to 8 months. Here is what that journey looks like on the calendar:
- Design and Permitting (4 to 12 weeks): Drafting blueprints, running engineering load calculations, submitting municipal paperwork, and waiting for departmental approvals.
- Site Preparation and Foundation (2 to 4 weeks): Excavation, pouring footings, curing concrete slabs, or laying foundation block.
- Framing and Weatherproofing (2 to 4 weeks): Erecting wall studs, setting roof rafters, installing exterior sheathing, house wrap, shingles, and windows to make the shell watertight.
- Mechanical Rough-Ins (2 to 3 weeks): Running electrical wiring, plumbing supply/waste lines, ductwork, and low-voltage lines, followed by municipal rough inspections.
- Insulation and Drywall (2 weeks): Installing spray foam or fiberglass batt insulation, hanging sheetrock, taping, mudding, and sanding.
- Interior Finishes and Fixtures (3 to 5 weeks): Laying flooring, setting trim, installing doors, hanging light fixtures, painting, and setting plumbing fixtures.
- Final Inspections and Walkthrough (1 to 2 weeks): Completing punch-list items and securing your formal Certificate of Occupancy (CO).
Financial Feasibility: ROI, Resale Value, and Stay vs. Move
An addition represents a substantial financial commitment, so weighing long-term market equity against upfront costs is a vital step in your decision-making process.
Resale Value and ROI Expectations by Room Type
While a home addition increases your total appraisal value, different room types recoup value at varying rates upon resale:
- Kitchen Remodels and Expansions: Recoup roughly 75% to 93% of their cost at resale, as updated kitchens remain the primary focal point for potential buyers.
- Mid-Range Bedroom Additions: Typically recover around 70% of construction costs while expanding your home’s functional buyer pool.
- Mid-Range Bathroom Additions: A standard full bathroom (~$65,000) recoups approximately 53% to 60% of its initial cost, ranking among the most stable value-adding improvements.
- Finished Basements and Garage Conversions: Offer impressive utility returns, frequently recapturing 70% to 80% of project expenses due to their lower initial construction costs per square foot.
Be mindful of your neighborhood ceiling. If the average home in your neighborhood sells for $600,000, investing $250,000 into an expansive addition might make your home the most expensive on the block, making it harder to recoup every dollar if you sell in the near term.
Weighing Your Options: Adding an Addition to a House vs. Moving
When your current home begins to feel cramped, you face a major question: should you expand your current space or pack up and find a larger property?
With 30-year fixed mortgage rates sitting near 6.5% in 2026, trading a lower legacy mortgage rate for a brand-new loan on a more expensive house can substantially increase your monthly payment. Staying in place avoids real estate commissions, transfer taxes, and closing costs—allowing you to channel those funds directly into custom square footage designed around your daily routines.
Frequently Asked Questions About Home Additions
How long does a home addition take from start to finish?
From your very first design sketch to the day you receive your Certificate of Occupancy, plan for a timeline of 5 to 9 months. The initial design, engineering, and permit review process usually takes 1 to 3 months depending on your town hall’s backlog. Actual hands-on construction typically runs 3 to 5 months for a ground-floor addition and 4 to 8 months for a complex second-story build, subject to weather conditions and specialty material lead times.
Can you live in your home during an addition build?
Yes, for most ground-floor extensions, bump-outs, and garage conversions, homeowners comfortably stay in the house throughout construction. Your general contractor will isolate work zones with heavy plastic zip-walls and floor protection to keep dust contained.
However, if your project involves a full second-story build (where the entire roof is temporarily removed) or an extensive whole-house kitchen and plumbing overhaul, arranging temporary housing for 4 to 8 weeks during the heavy rough-in stage is often much less stressful for your family.
Is building an addition doable as a DIY project?
Executing a full structural addition as a solo DIY project is generally not recommended and often not permitted by municipal building codes. Foundation excavation, load-bearing framing, structural roof ties, and licensed electrical/plumbing rough-ins must meet strict building standards and pass rigid municipal inspections to be insurable and legal.
However, handy homeowners can save noticeable labor costs by taking on safe, non-structural cosmetic tasks themselves—such as interior painting, installing baseboards, laying click-lock flooring, or assembling storage shelving once the contractor completes the drywall. If you are exploring initial concepts, reviewing our DIY home addition plans guide is a great way to understand the planning principles before hiring a crew.
Conclusion
Expanding your home is one of the most rewarding investments you can make, turning cramped quarters into functional, beautiful living spaces tailored specifically to your family's needs. Successful builds come down to careful early preparation: establishing realistic per-square-foot budgets, designing within municipal setback rules, and partnering with experienced builders who understand local construction demands.
At Absolute Builders NY Inc, we specialize in precision dormer additions, second-story builds, and custom ground extensions across Long Island—serving homeowners throughout West Babylon, Huntington, Bayville, Massapequa, Westhampton, Nassau County, and Suffolk County. When you are ready to explore your home’s architectural potential, visit our custom home addition services page to get started.