
Transforming Cramped Attics by Adding Dormers to Your Roofline
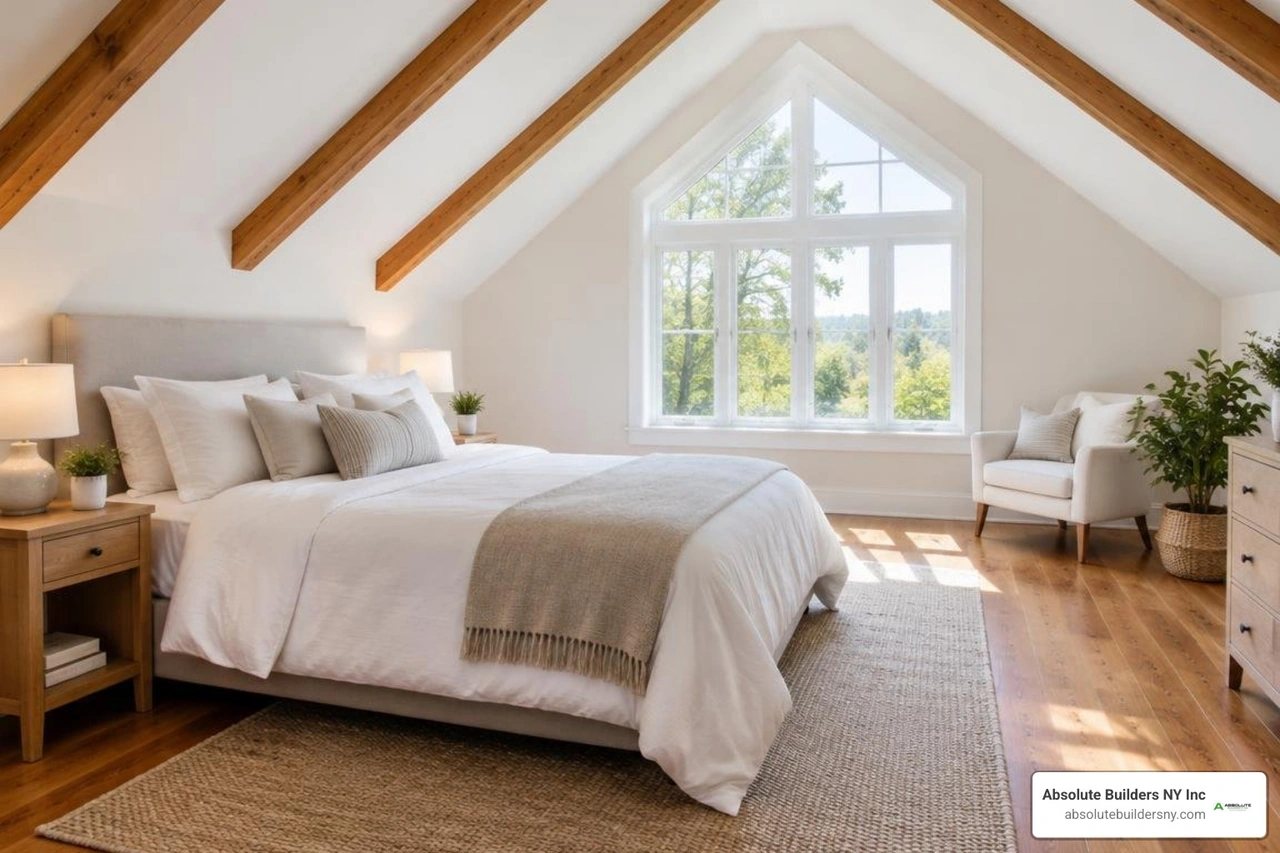
Adding Dormers to a House: Start With the Roof You Have
Adding dormers to a house starts with a roof and attic assessment. Before choosing a style, have a qualified contractor or structural engineer check the framing, roof slope, and floor support. Then choose a dormer that gives you the headroom you need, fits the house, and can be properly flashed and insulated. Check local permit rules before any roof work begins.
For a Long Island homeowner, that early planning can mean the difference between a bright, usable room and an addition that looks out of place or develops leaks.
I'm Jacolyn Gleason, a communications professional who helps make complex home projects easier to understand. In this guide to adding dormers to a house, I'll walk you through the design, construction, and cost decisions to discuss with your builder.
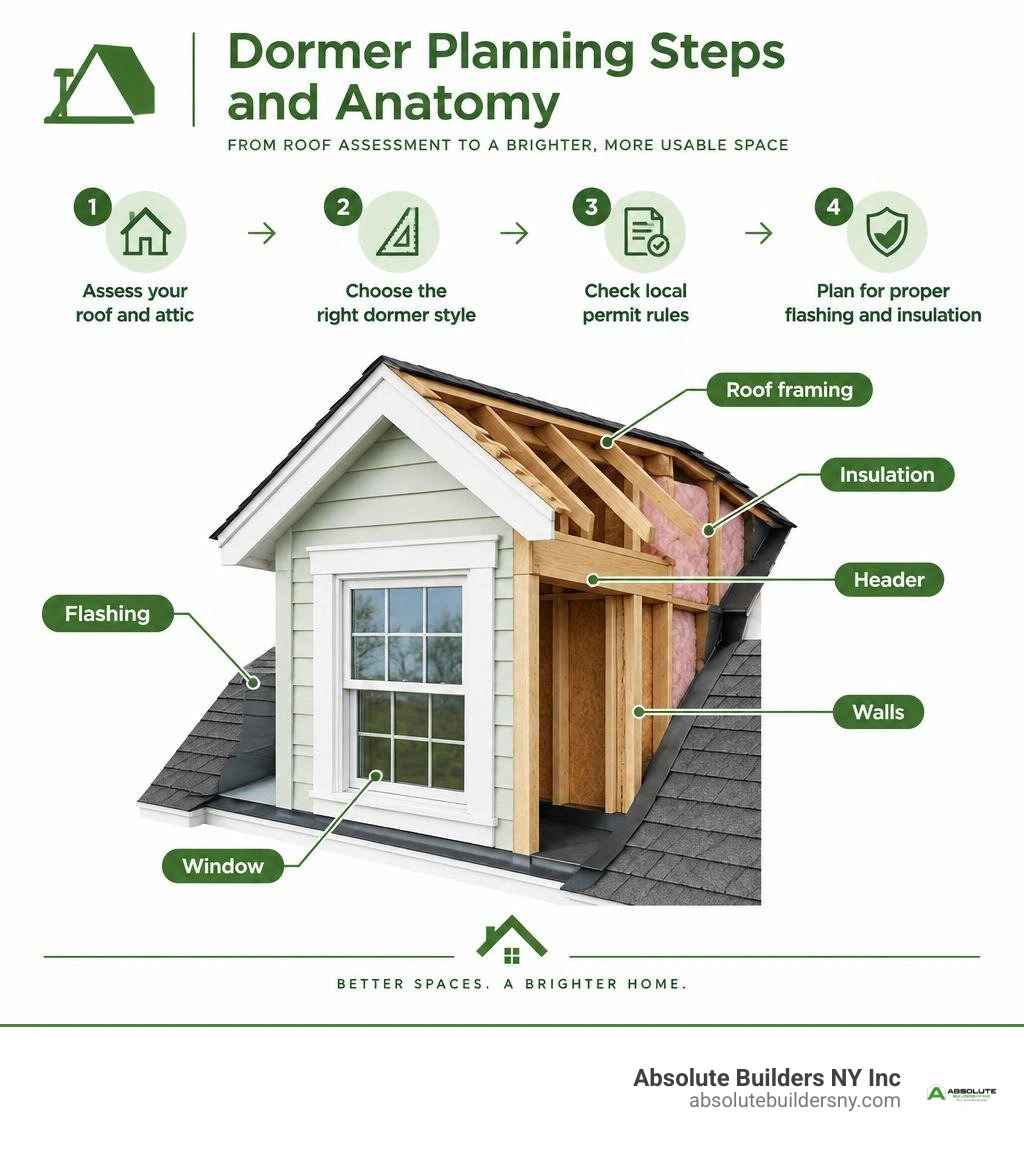
Adding dormers to a house helpful reading:
Architectural Styles and Types When Adding Dormers to a House
Choosing the right dormer begins with understanding your home's existing roofline and architectural profile. A dormer is a vertical projection built out of an existing sloped roof plane, providing increased headroom, functional floor space, and natural sunlight. When poorly planned, a dormer can resemble an awkward protrusion. When executed with precision, it looks like a natural extension of the original structure. Following the right architectural rules for fitting dormers to a house with proper scale and historic character ensures the final build complements your home's exterior lines.
The structural pitch of your main roof directly impacts which styles work best. Steeply pitched roofs (such as 8:12 or 12:12 slopes) accommodate nearly every dormer style with ease, whereas lower-slope roofs require careful framing to maintain positive drainage and weather protection.
Gable, Shed, and Hip Configurations
Every dormer design serves a distinct balance between exterior architectural form and interior volume. Understanding what dormers are on a house helps you select the right profile for your layout goals:
- Gable Dormers: Featuring a classic peaked, triangular roofline, gable dormers match traditional Cape Cod, Colonial, and Craftsman architectures. While framing a classic gable dormer adds modest floor area, it delivers natural light, classic curb appeal, and cozy window nooks.
- Shed Dormers: Designed with a single roof plane sloping in the same general direction as the main roof (but at a shallower angle), shed dormers maximize usable square footage. Consulting a detailed shed dormer expansion guide reveals why this style remains the top choice for carving out full bedrooms, home offices, and primary en suites.
- Hip Dormers: Composed of three sloping roof planes that meet at a ridge point, hip dormers blend into hipped roofs commonly found on Prairie, French Country, and select Craftsman homes. They offer excellent wind resistance and subtle exterior massing.
| Dormer Style | Typical Cost Range | Usable Space Gained | Min. Main Pitch | Structural Complexity | Best Architectural Fit |
|---|---|---|---|---|---|
| Gable | $3,000 – $8,500 | 20 – 40 sq ft | 6:12 | Moderate | Cape Cod, Colonial, Craftsman |
| Shed | $5,000 – $15,000 | 50 – 150+ sq ft | 4:12 | Moderate to High | Modern, Farmhouse, Ranch, Dutch Colonial |
| Hip | $4,500 – $10,000 | 25 – 45 sq ft | 6:12 | Moderate to High | Prairie, French Country, Georgian |
| Full-Width Shed | $15,000 – $35,000 | 150 – 300 sq ft | 4:12 | High | Cape Cod, Split-Level, Raised Ranch |
Multiple Small Dormers vs. One Large Shed Dormer
A frequent design question involves deciding between installing two or three smaller gable dormers versus a single, expansive shed dormer across the rear or front elevation.
Evaluating a dormer vs gable roof design comes down to your primary project goal: exterior symmetry versus maximum interior square footage. Multiple small gable dormers introduce balanced sightlines, historic charm, and distinct architectural accents along the front street elevation. However, each gable dormer creates angled cheek walls that limit usable floor area to small alcoves or reading corners.
In contrast, a wide shed dormer provides roughly two to three times the usable living space per construction dollar. By carrying a high, continuous ceiling across an entire room, a shed dormer enables full bathroom installations, wide closets, and standard furniture placement without ducking beneath sloped eaves. Many homeowners opt for a hybrid solution: installing classic gable dormers on the front façade for curb appeal, while framing a full-length shed dormer across the rear roofline to maximize interior volume.
Proportion, Scale, and Exterior Aesthetics
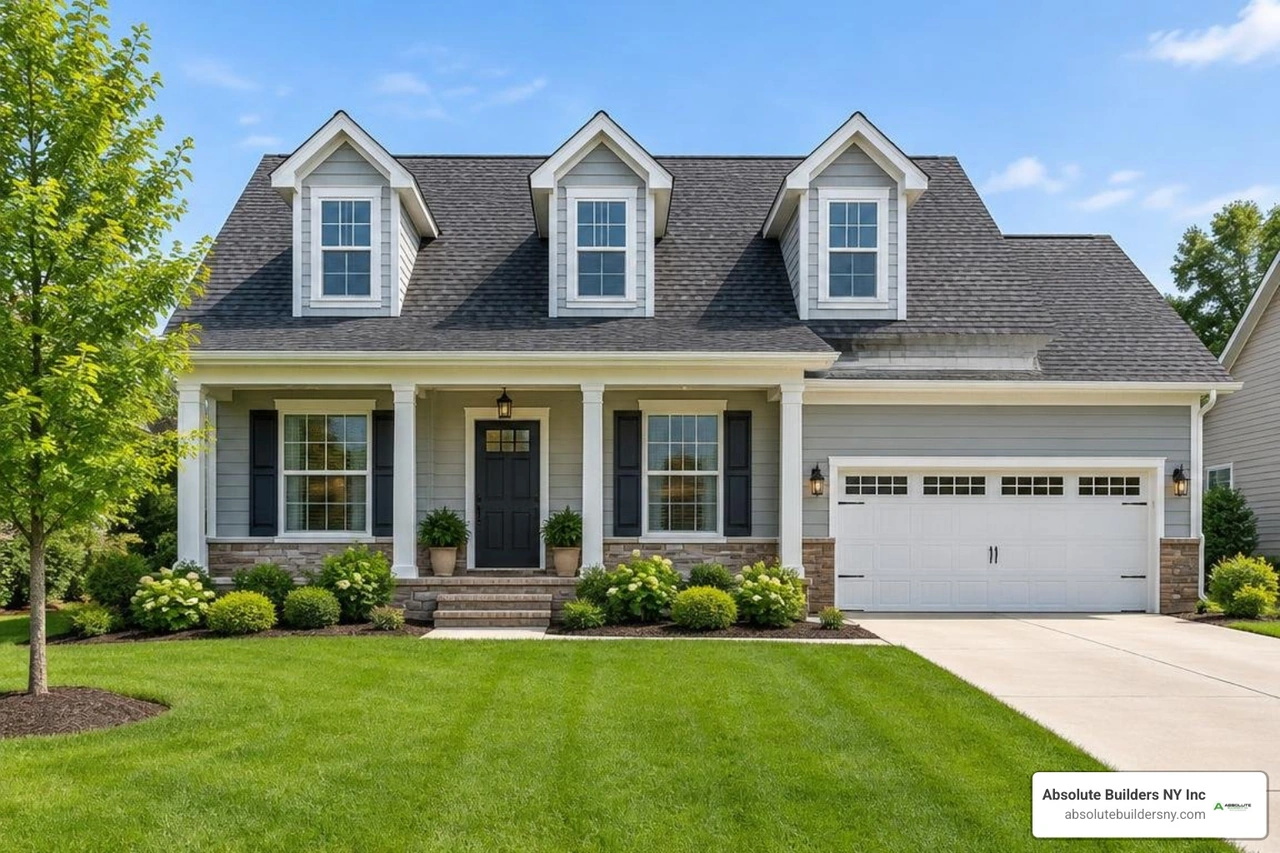
A dormer should serve as a scaled-down architectural reflection of the main house. When dormers look out of proportion, it is usually because they are oversized for the roof plane or feature windows that clash with the lower levels. Reviewing standard homeowner dormer design principles helps keep your project visually balanced.
Visual Balance and the 50 Percent Rule
To maintain pleasing curb appeal, architects and builders rely on the 50 percent rule: dormers should occupy no more than half the total width or depth of the roof plane on which they sit. Dominating more than 50 percent of the front roof plane can visually overwhelm the home's primary massing.
Key aesthetic and framing principles to follow include:
- Roof Pitch Minimums: Shed dormer roofs must maintain a minimum slope of 4:12 (four inches of vertical rise per twelve inches of horizontal run) to ensure rainwater and snow melt run off quickly without blowing under the shingles.
- Slender Cheek Walls: Framing dormer sidewalls (cheek walls) with 2x4 studs rather than bulky exterior assemblies keeps exterior profiles slender and historic while leaving sufficient room for high-performance insulation.
- Eave Recesses: Setting dormer front walls back at least 12 to 18 inches from the home’s primary exterior wall prevents an awkward top-heavy overhang.
Window Alignment and Egress Compliance
Window placement requires coordinating exterior symmetry with interior floor plan needs. Aligning dormer windows vertically with the centerlines of windows on the floors below creates balanced sightlines across the entire façade. Dormer window units should be slightly smaller than the primary ground-floor windows to preserve natural visual hierarchy.
When converting an attic space into a legal sleeping area, building codes require strict emergency exit access. Following standard dormer window installation steps alongside regional dormer bedroom egress window standards ensures safety compliance.
Under the International Residential Code (IRC), an egress window must provide:
- Minimum net clear opening of 5.7 square feet (5.0 sq ft at grade level).
- Minimum clear opening height of 24 inches.
- Minimum clear opening width of 20 inches.
- Maximum sill height of 44 inches above the finished floor.
Thoughtful planning brings balanced light and functional sightlines into your space, enhancing the overall dormer interior layout and natural lighting.
Framing, Load Paths, and Weatherproofing Steps
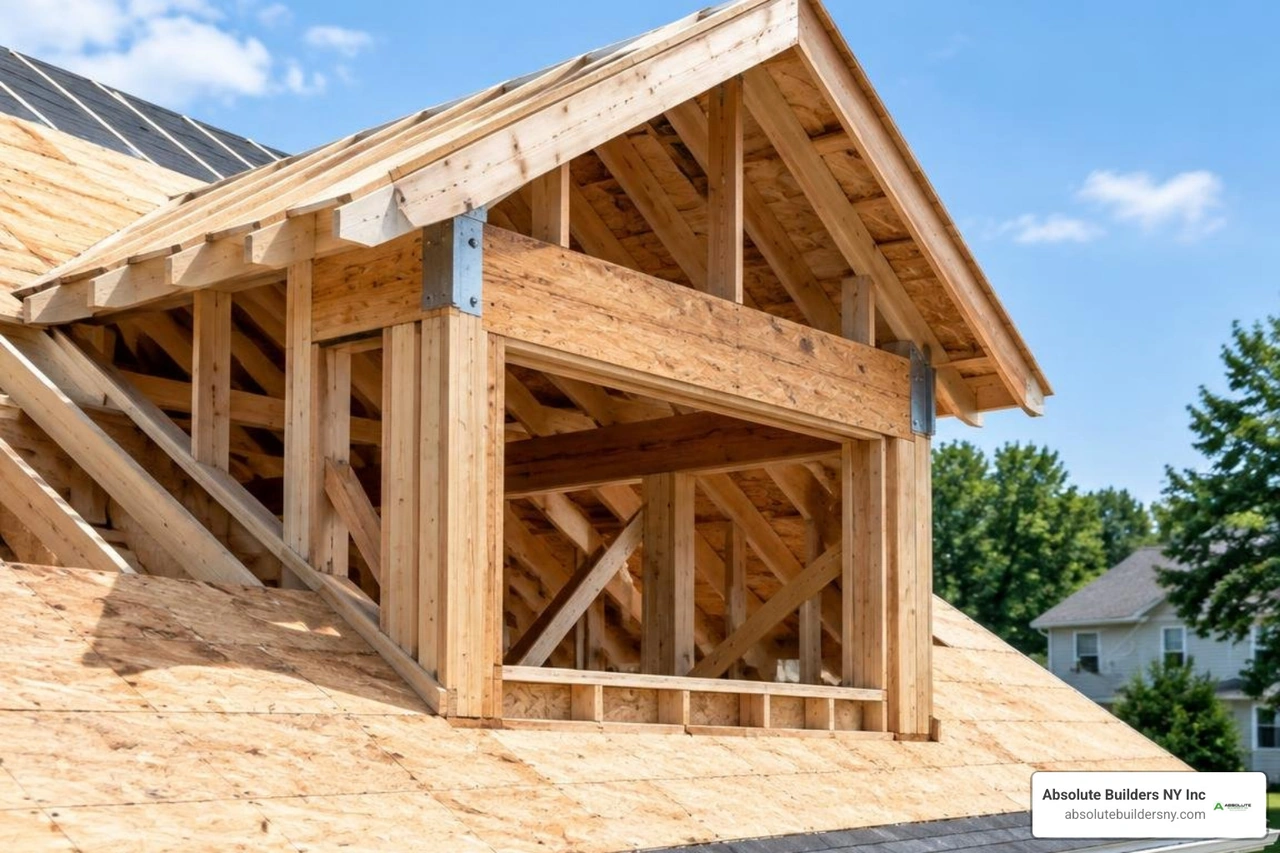
Cutting into a residential roof structure requires careful engineering. Roof rafters act as structural chords under continuous compression and tension; cutting them interrupts the existing load path, requiring structural reinforcement to redistribute weight down to the foundation. Following established dormer structural framing and design best practices ensures long-term roof stability.
Structural Engineering Essentials Before Adding Dormers to a House
Before making a single cut, an engineer evaluates the existing rafter sizing, collar ties, and ceiling joists to calculate load redistribution. If your home uses manufactured web trusses rather than traditional stick-built framing, altering any chord requires engineer-stamped modification drawings.
The structural modification sequence follows a rigorous path:
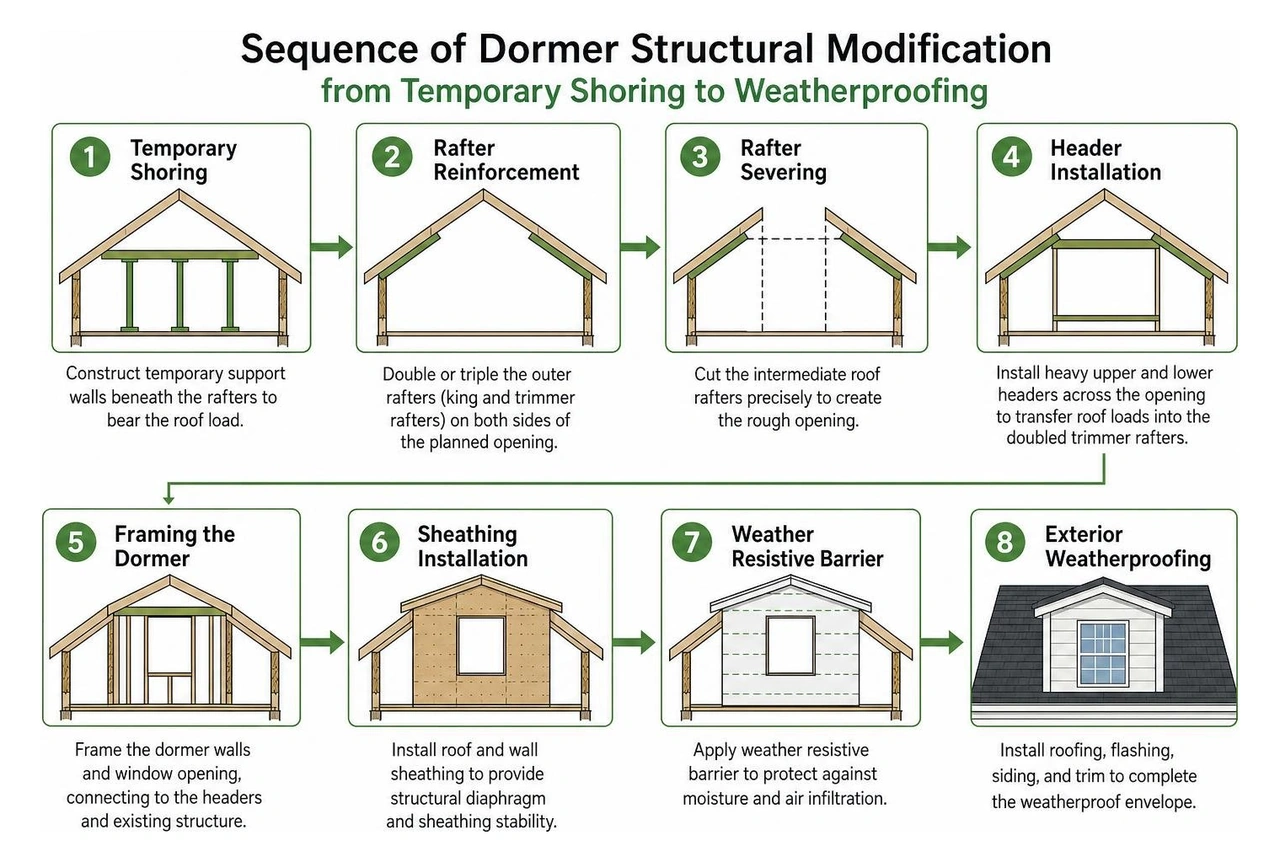
- Temporary Shoring: Constructing temporary support walls beneath the rafters on the attic floor to bear the roof load during construction.
- Rafter Reinforcement: Doubling or tripling the outer framing members—known as king rafters and trimmer rafters—on both sides of the planned opening to carry the redirected load.
- Rafter Severing: Cutting the intermediate roof rafters precisely to create the rough opening.
- Header Installation: Fastening heavy upper and lower structural headers across the opening to transfer roof loads directly into the doubled trimmer rafters.
Consulting our complete dormer addition planning guide provides a deeper look into preparing your framing layout before construction begins.
Header Sizing, Wall Framing, and Flashing Details
Header dimensions depend entirely on the dormer opening span, roof pitch, and regional snow load requirements:
- Spans up to 4 Feet: Doubled 2x8 dimensional lumber.
- Spans 4 to 6 Feet: Doubled 2x10 dimensional lumber.
- Spans 6 to 8 Feet: Doubled 2x12 dimensional lumber.
- Spans 8 to 12 Feet: Tripled 2x12 lumber or engineered Laminated Veneer Lumber (LVL) / Glulam beams.
Improper flashing remains the primary cause of post-construction roof leaks. As the old builder adage goes, if you ignore your flashing, you'll be dealing with leaks for weeks.
To achieve a 100% watertight seal where the dormer meets the main roof plane:
- Self-Adhering Membrane: Apply an ice-and-water protection membrane across the roof valleys, extending at least 12 inches up the dormer cheek walls and 24 inches onto the roof deck.
- Step Flashing: Install individual, L-shaped pieces of step flashing integrated with every single shingle course along the side cheek walls. Never use a single continuous length of angle metal along a sloped junction, as it invites water infiltration beneath shingle seams.
- Counterflashing & Kick-Out Flashing: Install counterflashing over the step flashing layers, embedded under the dormer siding, and place kick-out flashing at the lower eave intersections to deflect runoff away from wall siding into gutters.
Energy Efficiency, Insulation, and Ventilation Standards
Dormer additions introduce complex exterior wall-to-roof transitions that can create thermal bridging, condensation, and ice damming if not detailed properly.
Meeting Thermal Codes and Preventing Ice Dams
Attic ceilings and sloped dormer assemblies require robust thermal boundaries. Modern energy building codes mandate minimum thermal performance levels:
- Ceilings and Roof Cavities: Minimum R-38 to R-49 insulation value.
- Dormer Sidewalls (Cheek Walls): Minimum R-19 to R-21 batt or continuous rigid foam.
When framing cheek walls with 2x4 studs to preserve a slender exterior aesthetic, standard fiberglass batts yield only R-13 to R-15. To bridge this gap, apply continuous R-5 to R-7.5 polyisocyanurate rigid foam sheathing over the exterior before installing siding.
To prevent winter ice dams, maintain a continuous path of cold air circulation from the dormer soffit intake vents up to a dedicated ridge vent. Installing rigid vent baffles against the underside of the dormer roof deck guarantees at least 1 to 2 inches of unobstructed airflow above the insulation. This keeps the roof surface temperature consistent with ambient outdoor air, preventing interior heat from melting rooftop snow packs that refreeze at the cold eaves.
Project Costs, Value Added, and Return on Investment
Adding a dormer is a cost-effective way to expand usable living space without expanding your home's exterior footprint or sacrificing yard space.
Estimating Investment Costs When Adding Dormers to a House
On a national level, comprehensive national dormer addition cost ranges and budgeting indicate that homeowners spend between $20,000 and $60,000 for a fully finished dormer conversion, with regional market dynamics, structural complexity, and finish selections shaping total expenses.
Detailed real-time scenarios in our dormer addition cost guide for U.S. homes highlight how budgets break down across materials and labor:
- Small Gable Dormer: $3,000 to $8,500 (framing, roof tie-in, window, and exterior siding).
- Standard Shed Dormer (Single Room): $8,000 to $18,000.
- Full-Width Rear Shed Dormer (Master Suite / Bath): $25,000 to $55,000+.
For local planning, reviewing regional dormer addition costs in Long Island provides accurate pricing for communities across Nassau County and Suffolk County, NY—such as Massapequa, West Babylon, Huntington, and Westhampton. Labor and structural work make up approximately 40% to 50% of the total budget ($6,000 to $28,000), while building permits and architectural engineering drawings average $1,200 to $3,500. We always advise maintaining a 20% contingency budget to cover unexpected discoveries, such as outdated electrical wiring or undersized floor joists in older attics.
Real Estate ROI and Usable Square Footage Gains
From an appraisal standpoint, dormer additions offer strong return on investment. Dormers typically yield a 65% to 75% ROI at resale. When a shed or gable dormer converts an unconditioned storage attic into a fully finished, legal bedroom, it can add $20,000 to $40,000 in immediate equity to the home.
To count as official legal living space under the International Residential Code:
- The space must provide at least 7 feet 6 inches of ceiling height over at least 50% of the required floor area.
- Any floor area with a ceiling height of less than 5 feet cannot be counted toward habitable square footage calculations.
By lifting the roofline and satisfying these height minimums, a dormer addition transforms wasted eave space into verified, appraiser-recognized square footage.
Frequently Asked Questions About Dormer Additions
Do all dormer additions require building permits?
Yes. Adding a dormer involves modifying primary structural roof rafters, altering the exterior building envelope, and running electrical and HVAC mechanicals. Municipalities across Nassau and Suffolk County require stamped architectural or structural engineering plans, plan reviews, and mandatory progress inspections before issuing a final Certificate of Occupancy (CO).
How long does a dormer addition project take from start to finish?
The physical framing and weather-tight enclosure of a single dormer typically takes 1 to 2 weeks, weather permitting. Critical roof-opening cuts are scheduled during dry forecast windows. Completing rough mechanicals, insulation, drywall, window trim, and final interior painting brings the entire project timeline to roughly 4 to 7 weeks.
Can a dormer be built on any style of roof?
Most stick-built roofs with traditional dimensional lumber rafters (2x6, 2x8, 2x10) and a pitch of at least 4:12 can accommodate a dormer addition. Manufactured truss roofs present greater engineering challenges because cutting any internal web member compromises the entire truss span. Truss roofs require specialized engineered support framing or sistered rafters, but dormer installations remain achievable with proper planning.
Conclusion
Modernizing an underutilized, cramped attic by adding dormers increases natural light, adds usable headroom, and expands living space without expanding your home's foundation footprint. Achieving a safe, weather-tight build requires attention to load path reinforcement, roof pitch minimums, step flashing, and thermal insulation.
At Absolute Builders NY Inc, we bring precision craftsmanship and dedicated partnership to homeowners across Long Island, NY—serving communities throughout Massapequa, Bayville, Huntington, West Babylon, and Westhampton. When you are ready to expand your living space and enhance your home's curb appeal, explore our custom dormer addition and construction services to bring your vision to life.