
Raise the Roof: The Ultimate Guide to Framing a Gable Dormer
Why Framing a Gable Dormer Is One of the Best Investments You Can Make in Your Home
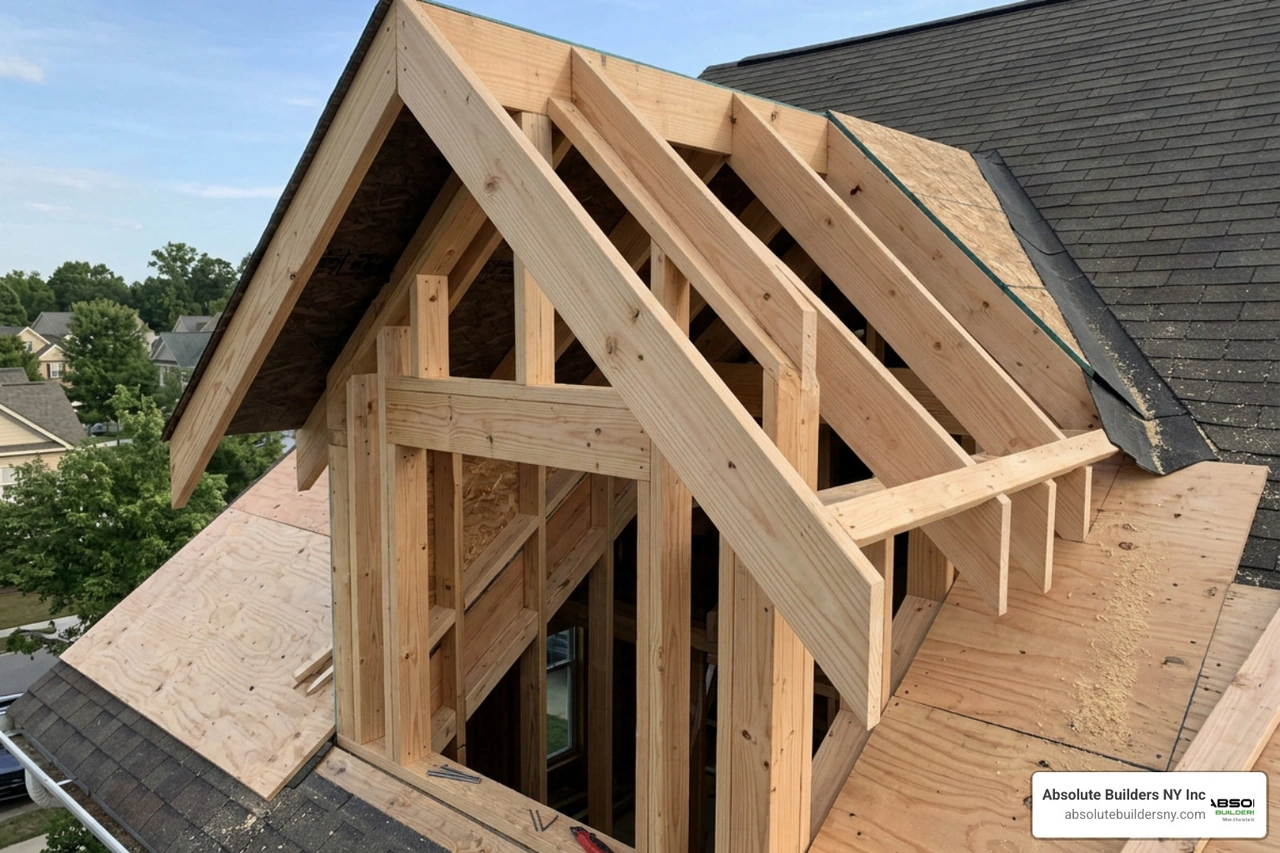
Framing a gable dormer is one of the most rewarding upgrades a Long Island homeowner can make — turning a cramped, underused attic into bright, livable space without adding a full addition.
Here is a quick overview of the core steps:
- Plan and permit — Work with an architect and obtain a building permit before touching the roof.
- Establish the load path — Determine how dormer loads transfer to existing rafters or floor joists.
- Pre-cut all framing members — Cut the ridge, rafters, and wall plates before opening the roof.
- Install doubled or tripled rafters and headers — Reinforce the opening on both sides.
- Frame the dormer walls and roof — Assemble front wall, set the ridge, install valley and common rafters.
- Weatherproof immediately — Apply underlayment, step flashing, and sheathing the same day you open the roof.
- Insulate, vent, and finish — Seal air gaps, meet local R-value requirements, and complete interior framing.
A well-built gable dormer typically adds roughly 30 square feet of headroom, floods the room with natural light, and boosts curb appeal — all in a footprint that fits neatly between existing rafters. Done right, the entire framing and dry-in can be completed in as little as one to two days with a small crew. Done wrong, it becomes a source of leaks, structural headaches, and failed inspections.
This guide walks you through every stage — from load path design and rafter math to flashing details and code compliance — so you get it right the first time.
I'm Jacolyn Gleason, a Senior Vice President at 5W Public Relations with extensive experience translating complex technical projects — including home construction and remodeling topics like framing a gable dormer — into clear, actionable guidance for homeowners. I'll help you cut through the confusion so you can move forward with confidence.
Understanding the Gable Dormer: Anatomy, Load Paths, and Shed Comparisons
Before picking up a framing nailer or a circular saw, we must understand exactly what we are building. A Gable Dormer is a roofed structure containing a window that projects vertically beyond the plane of a pitched roof. It features a classic peaked roof with two sloping sides that meet at a center ridge, forming a triangular gable wall at the front.
This differs significantly from a shed dormer, which has a single, flat roof sloping in the same direction as the main roof but at a shallower angle. While shed dormers are excellent for maximizing raw square footage over a wider area, gable dormers offer superior architectural elegance, better water shedding, and classical proportions that complement the traditional homes found throughout Long Island.
| Feature | Gable Dormer | Shed Dormer |
|---|---|---|
| Roof Style | Peaked (two sloping sides meeting at a ridge) | Single sloping plane (shallower than main roof) |
| Primary Benefit | Architectural appeal, localized light, and classic style | Maximum headroom and usable floor space |
| Water Shedding | Excellent (sheds water to both sides) | Moderate (relies on a single slope, minimum 4:12 pitch) |
| Load Distribution | Side walls (cheeks) carry the roof load | Front (end) wall carries the roof load |
| Labor & Complexity | Higher framing complexity (valleys, jack rafters) | Lower framing complexity |
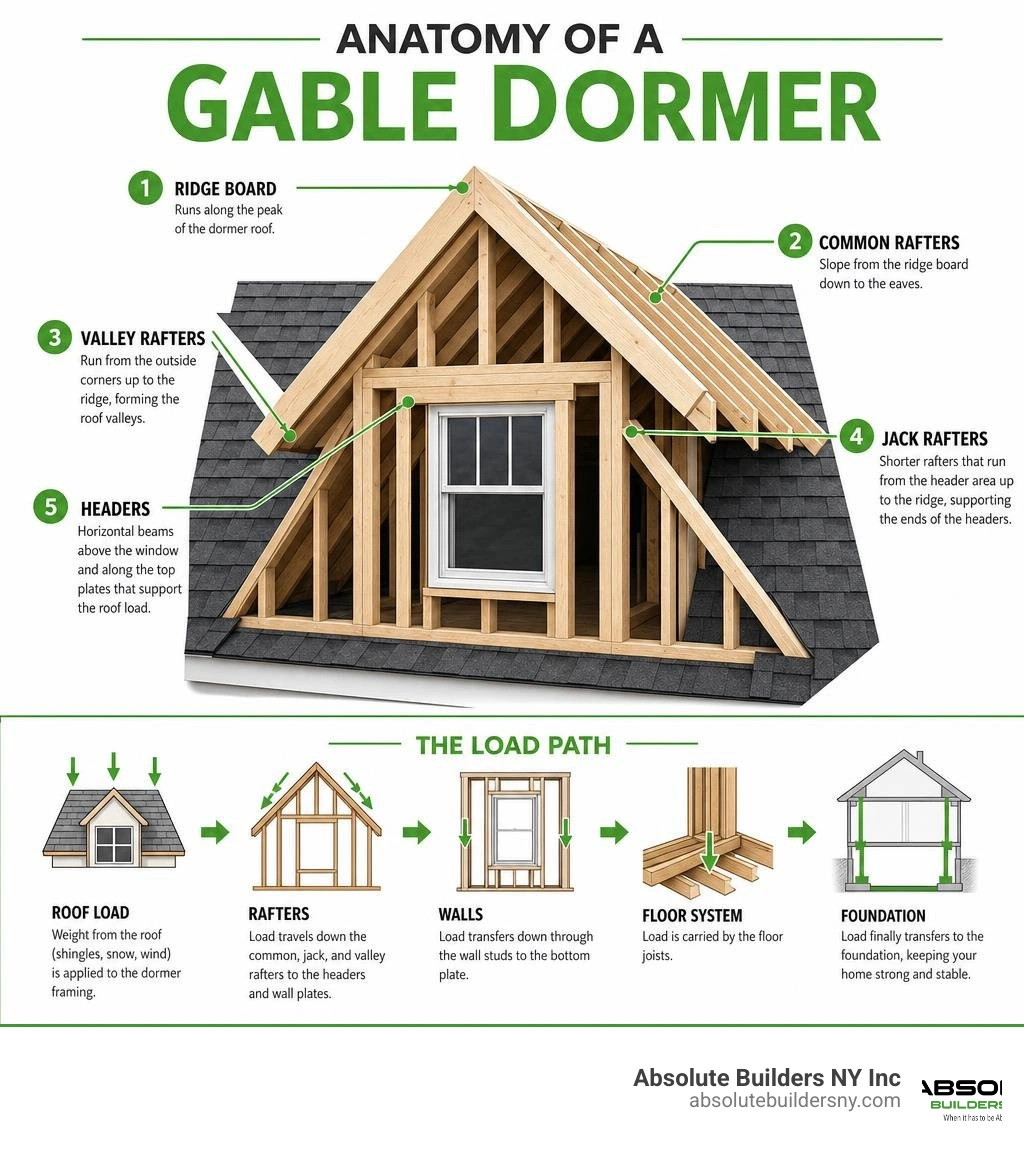
To successfully frame a gable dormer, you must become familiar with its anatomy:
- Ridge Board/Beam: The horizontal structural member at the peak of the dormer roof where the upper ends of the rafters meet.
- Common Rafters: The diagonal rafters that run from the dormer ridge down to the top plates of the dormer cheek walls.
- Valley Rafters: The diagonal rafters that form the intersection where the dormer roof meets the main roof plane. These run at a 45-degree angle relative to the ridge in a standard equal-pitch roof.
- Jack Rafters: Shorter rafters that cut into the valley rafter, running from the valley to the dormer ridge (valley jacks) or from the main roof ridge to the valley.
- Load Path: The continuous path that structural loads (including weight, snow, and wind) travel from the roof down to the foundation.
Establishing the Roof Load Path
Every structure must safely transfer its weight to the earth. When we cut open an existing roof to frame a dormer, we disrupt the original, engineered load path. The weight of the new dormer roof, the window, the walls, and any environmental loads (like heavy winter snow in Suffolk County) must be redirected.
There are two primary ways to handle the load path for a gable dormer:
- Bearing on Roof Rafters: For smaller, narrower dormers (often under 4 feet wide), the cheek walls can sit directly on reinforced main roof rafters. We achieve this by doubling or tripling the existing rafters on either side of the dormer opening. These reinforced rafters act as structural trimmers that carry the load down to the exterior load-bearing walls of the house.
- Bearing on Floor Joists: For larger dormers, or when we want to keep the attic space completely open without massive rafter reinforcements, the cheek walls can extend down to bear directly on the attic floor joists. If the joists run parallel to the cheek walls, we must double or triple the joists beneath those walls. If they run perpendicular, we must verify that the joists have the span capacity to handle the concentrated point loads.
Understanding this load distribution is crucial for maintaining your home's structural integrity. For a deeper dive into how these structures interact with your home, check out our guide on What Are Dormers: A Guide to Adding Space, Value and Functionality.
Pre-Construction Planning and Safety for Framing a Gable Dormer
You should never climb onto a roof with a reciprocating saw without a rigorous plan. Framing a gable dormer is an advanced structural modification. Unlike building a deck or remodeling a kitchen, you are temporarily leaving your home vulnerable to the elements and structurally compromised.
Thorough preparation is the difference between a seamless execution and a ruined attic ceiling. For a comprehensive overview of how to prep your home for this transition, read through Dormer Framing for an Existing Roof: A Practical Guide – New England Metal Roof.
Essential Tools and Safety Gear for Framing a Gable Dormer
Working at heights demands specialized safety gear and precision tools. Do not skimp on safety; a single fall can be catastrophic. Before starting, gather the following:
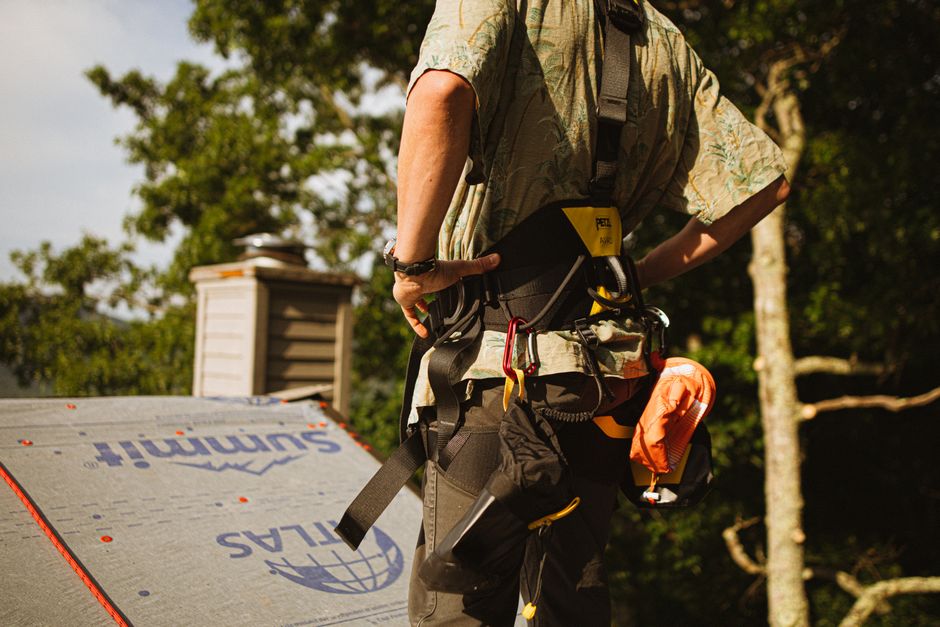
- Personal Fall Arrest System (PFAS): A high-quality full-body harness, lanyard, roof anchor, and vertical lifeline. Expect to spend about $250 to buy one or look into local equipment rentals.
- Roofing Brackets & 2x10 Planks: These brackets nail into the rafters through the roof sheathing, providing stable, level platforms to stand on while working on steep pitches.
- Circular Saw & Reciprocating Saw: For clean, rapid cuts of both new lumber and existing rafters.
- Framing Square & Speed Square: Essential for laying out complex angles, plumb cuts, and seat cuts.
- Levels (2-foot and 4-foot): To ensure your front wall and cheek walls are perfectly plumb and the ridge is perfectly level.
- Mesh-Reinforced Tarps & 2x4s: To secure the open roof against sudden Long Island downpours.
- Soft-Soled Work Boots: For maximum traction on plywood sheathing.
Pro Tip: Keep a broom on the roof. Sawdust on sloped plywood acts like microscopic ball bearings. Sweep your work platform frequently to maintain solid footing.
Engineering and Permitting Requirements
In Nassau County and Suffolk County, you cannot simply build a dormer on a whim. Local municipalities—whether you are in West Babylon, Huntington, Massapequa, or Bayville—have strict zoning setbacks, wind-load requirements, and building codes. Because Long Island is prone to coastal winds and hurricane-force gusts, your framing must be engineered to withstand high uplift pressures.
Before applying for a building permit, you will need architectural blueprints. An architect or structural engineer will calculate:
- The exact size of the structural headers and trimmer rafters.
- The fastening schedule (nailing patterns, joist hangers, and structural screws).
- Egress compliance. If your new dormer is for a bedroom, the window must meet strict egress codes: a maximum sill height of 44 inches from the finished floor, a minimum net-clear opening of 5.7 square feet, a minimum opening height of 24 inches, and a minimum width of 20 inches.
Failing to secure permits can result in costly fines, stop-work orders, and major issues when you eventually try to sell your home. To ensure your investment is fully protected, learn more about Dormer Addition Warranties NY.
Step-by-Step Guide to Cutting and Installing Dormer Rafters

Once your plans are approved, the lumber is delivered, and you have a clear weather window, it is time to start cutting. The key to a fast, successful build is to pre-cut as many components as possible on the ground or on the attic floor before opening the roof. This keeps your home exposed to the weather for the shortest time possible. For a classic DIY perspective on this physical sequence, you can consult How to Frame a Gabled Dormer (DIY) | Family Handyman.
Layout and Math for Framing a Gable Dormer Rafters
To cut your rafters accurately, you must understand the relationship between the rise, run, and pitch of both the main roof and the dormer roof.
- Build a Rafter Jig: Using a scrap piece of plywood, draw a level line and a perpendicular plumb line. Use these lines to set your framing square to the target pitch (for example, an 8:12 pitch). Mark the plumb cut (at the ridge) and the seat cut (the birdsmouth where the rafter rests on the wall plate). Use this template to cut all your common rafters identically.
- The Birdsmouth Cut: This is the triangular notch cut into the rafter that allows it to sit flat on the top wall plate. It consists of a horizontal "seat cut" and a vertical "heel cut." Never cut deeper than one-third of the rafter's depth to avoid structurally weakening it.
- Valley Jack Rafters: These are the trickiest cuts. Because they meet the valley rafter at an angle, their bottom cuts require a compound angle—specifically, a 45-degree bevel. The top cut is a standard plumb cut that fits against the dormer ridge.
For highly detailed structural deep-dives into compound rafter calculations, we highly recommend reading Framing Gable and Shed Dormers.
Sizing and Installing Headers and Trimmers
When you cut existing rafters to make way for the dormer, those cut rafters (now called cripple rafters) are left hanging. To support them, we must install structural headers at the top and bottom of the opening, effectively creating a structural picture frame within the roof.
- Trimmer Rafters: The uncut rafters on the left and right sides of the opening are reinforced by sistering them with one or two additional rafters. These "trimmers" carry the concentrated weight from the headers.
- Headers: Sized according to the span (often doubled 2x8s, 2x10s, or Engineered LVL lumber), these are nailed perpendicular to the trimmers. The cut cripple rafters are then secured to the headers using structural metal hangers. This ensures the roof load is safely distributed around the new opening and down to the bearing walls.
Weatherproofing, Insulation, and Ventilation Best Practices
A perfectly framed dormer is useless if it leaks or creates ice dams during a cold Suffolk County winter. The intersections where the dormer walls and roof meet the main roof are notorious prime targets for water intrusion. You must construct these junctions to be completely watertight. To understand how water management fits into the broader scope of dormer construction, refer to Dormer Framing: How to Build a Gable or Shed Dormer.
- Ice and Water Shield: Before installing any shingles or flashing, apply a self-adhering, rubberized ice and water membrane. Run this membrane at least 36 inches up the valleys, up the cheek walls, and around the sill of the window opening.
- Step Flashing: Where the vertical cheek walls meet the sloped main roof, you must install step flashing. These are L-shaped metal shingles that weave into every single course of roofing shingles. Never rely on a single, continuous piece of metal here; water will find its way behind it.
- Counter Flashing: This metal flashing is integrated into the siding of the dormer, overlapping the step flashing below to shed water outward. Always "think like a raindrop"—every layer of underlayment, flashing, and siding must overlap the layer below it.
- Insulation and Air Sealing: Attics get incredibly hot in the summer and freezing in the winter. Use continuous insulation (such as rigid foam board) combined with high-R-value batts or spray foam in the cheek walls and rafter bays. Seal every joint, wire penetration, and framing seam with expanding polyurethane foam to prevent conditioned air from escaping into the roof cavities.
- Baffled Ventilation: To prevent condensation and wood rot, maintain a continuous ventilation path from the soffits at the eave of the dormer up to the ridge vent. Install insulation baffles (chutes) against the roof sheathing before insulating to ensure air can flow freely.
Frequently Asked Questions about Gable Dormer Framing
How much does it cost to frame a gable dormer in 2026?
In July 2026, the cost to frame a gable dormer on Long Island typically ranges from $5,000 to $25,000+ per dormer, depending on several critical factors:
- Size and Complexity: A simple 4-foot-wide dormer that fits between existing rafters without major structural alterations sits on the lower end. A large, 12-foot-wide dormer requiring engineered LVL beams, structural steel, or floor joist sistering will easily push toward the higher end.
- Material Costs: High-quality dimensional lumber, engineered wood, advanced flashing systems, and energy-efficient egress windows are significant cost drivers.
- Labor and Location: Local labor rates in Nassau and Suffolk counties reflect the high demand for skilled trade professionals.
To plan your budget accurately and explore local pricing trends, review our comprehensive breakdown on the Cost to Dormer a House Long Island.
How long does it take to frame and dry-in a dormer?
With a professional, experienced crew of two to three carpenters, a standard gable dormer up to 12 feet wide can be framed, sheathed, and "dried-in" (made completely weather-tight with underlayment and flashing) in less than two days—often in just a single day.
The secret to this speed is preparation. By building the front wall on the attic floor, pre-cutting all rafters, and staging the materials beforehand, we can minimize the time your roof is actually open to the elements to just a few hours.
What are the most common mistakes to avoid during installation?
Over our decades of building on Long Island, we have seen DIYers and inexperienced handymen make the same critical mistakes:
- Cutting Rafters Without Temporary Support: Before you cut a single existing rafter, you must build a temporary "deadwood" support wall inside the attic to hold the weight of the roof. Failing to do so will cause the roof ridge to sag instantly.
- Improper Valley Flashing: Valleys carry a massive volume of water during heavy rain. Relying on cheap caulk instead of a woven metal valley flashing and ice-and-water membrane is a guaranteed recipe for a ceiling leak within two years.
- Ignoring Egress Code: Designing a beautiful new bedroom only to find out during final inspection that your window is 2 inches too small to meet emergency escape codes is a devastatingly expensive mistake to fix.
- Poor Air Sealing: Skipping the air-sealing phase leads to warm air escaping into the cold roof space, melting snow, and causing massive ice dams along your gutters.
Conclusion
Framing a gable dormer is a sophisticated blend of geometry, structural engineering, and weatherproofing. When executed with precision craftsmanship, it completely transforms the look, feel, and value of your home, turning an dark attic space into a sun-drenched sanctuary.
However, because this project requires cutting into your home's main structural support system and leaving it temporarily exposed to the elements, it is rarely a suitable project for a casual weekend DIYer.
At Absolute Builders NY Inc, we specialize in high-quality dormer construction across Long Island—from West Babylon and Huntington to Massapequa and Westhampton. We bring dedicated partnership, precision craftsmanship, and deep knowledge of local Nassau and Suffolk County building codes to every single project we touch.
If you are ready to expand your living space, let our expert team handle the heavy lifting, the complex math, and the structural engineering. Reach out to us today to discuss your vision, or explore our specialized Dormer Addition services to take the first step toward raising your roof!